How to Clean an Electric Food Slicer the Right Way
Recommended picks


What You Need Before You Start
Gather cut-resistant gloves rated for slash protection before you do anything else. You will also need a soft-bristle brush or old toothbrush, dish soap, clean cloths or paper towels, and a food-safe sanitizing solution such as a diluted no-rinse sanitizer or a light bleach solution of about one tablespoon of bleach per gallon of water. A drying rack or clean towel for the parts to air-dry on rounds out the supplies. Lightweight home slicers like the Presto 02970, which weighs 3.9 lb, are easy to move to the sink, while heavier countertop models like the Cuisinart FS-75 at 11 lb are easier to clean in place on the counter.
Step 1: Power Off and Disassemble Safely
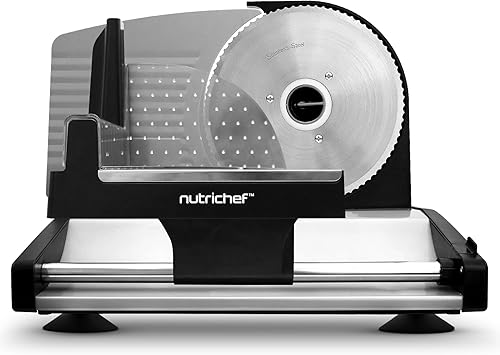
Unplug the machine from the wall outlet first, every single time, with no exceptions. Turn the thickness dial all the way to zero so the blade guard closes over the cutting edge as much as possible. Put on your cut-resistant gloves before your fingers get anywhere near the blade. Remove the food carriage, the blade guard, the product tray, and any other parts your model identifies as removable in its manual. Most home slicers in the $60 to $130 range, including compact models like the NutriChef NUGJ801 with its 13.9 x 9.9 x 10.9 in footprint, follow the same basic disassembly sequence, so checking your manual once is usually all you need.
Step 2: Wash Removable Parts by Hand
Take the removed parts to the sink and wash them one at a time in warm water with a few drops of dish soap. Use the soft brush to scrub any grooves, slots, or textured surfaces where food particles hide. Rinse each part under running water until the water runs clear and no soap residue remains. Do not put any slicer part in the dishwasher unless the manual says it is dishwasher-safe, because high heat and aggressive detergents can warp plastic components and dull blade edges. Lay the clean parts on a drying rack or towel and leave them there until you finish cleaning the main body.
Step 3: Clean the Blade and Main Body
The blade stays attached to the motor housing on most home slicers, so you clean it in place. Keeping your gloves on, dampen a cloth or heavy paper towel with soapy water and wipe the flat faces of the blade with firm, outward strokes, always moving away from the cutting edge. Then wipe the back of the blade and the area directly behind it where grease and meat fiber accumulate. Use the soft brush to work the bristles around the blade hub and the area just inside the guard slot. Wipe the entire outer body of the slicer with a damp cloth to pick up any grease splatter, then go over everything with a dry cloth.
Step 4: Sanitize the Blade and Food-Contact Surfaces
Washing removes visible debris, but sanitizing kills bacteria left on food-contact surfaces. Dampen a clean cloth with your diluted sanitizer and wipe the blade faces, the food carriage, and the product tray. If you use a no-rinse formula, let the surfaces air-dry. If you use a bleach solution, do a final wipe with a plain damp cloth followed immediately by a dry cloth, because bleach residue can corrode metal over time. This sanitizing step matters most after slicing raw poultry, pork, or fish, but it is a good habit to follow every time.
Step 5: Dry Completely and Reassemble
Moisture left on metal parts leads to rust and can promote bacterial growth, so drying is not optional. Pat every part dry with a clean cloth, then let everything air-dry for at least 15 minutes before reassembling. When all parts are dry, reverse the disassembly steps and confirm the blade guard seats correctly and the thickness knob returns to zero. Store the slicer in a location where the blade guard will not be bumped or knocked, ideally covered with a cloth or the original box. A well-maintained slicer, even an affordable one like the Cuisinart FS-75 at around $119, will hold its cutting performance much longer when it is dried and stored properly after every clean.
Common mistakes to avoid
- Cleaning without unplugging first, which risks a sudden startup if the switch is accidentally bumped.
- Skipping gloves and wiping toward the blade edge instead of away from it.
- Putting plastic parts in the dishwasher when they are not rated for it, causing warping that makes the guard fit poorly.
- Leaving water or soap film on the blade overnight, which causes rust spots even on stainless blades.
- Using steel wool or abrasive pads on the blade face, which scratches the surface and makes food stick more easily.
- Reassembling before parts are fully dry and trapping moisture inside the housing near the motor.
Frequently asked questions
How often should I clean my electric slicer?
Clean it after every use when you slice raw meat, poultry, or fish because bacteria multiply fast on protein residue. For cheese and cooked deli meats, cleaning every two to three uses is reasonable for home kitchens, though a quick wipe-down after each session is always a good idea. The cleanup only takes about 10 minutes once you have the routine down.
Can I put my slicer parts in the dishwasher?
Only if your specific model says so in its manual. Most home slicers, including popular models in the $60 to $130 range, have plastic components that warp in the high heat of a dishwasher cycle, and the intense water pressure can force moisture into areas that are hard to dry out. Hand washing with warm soapy water takes only a few minutes and is safer for the parts and the blade edge.
What is the safest way to handle the blade while cleaning?
Wear cut-resistant gloves rated for slash protection before touching anything near the blade. Set the thickness dial to zero to close the blade guard as much as possible, and always wipe with strokes that move away from the cutting edge, never toward it. Treat the blade as if it is sharp no matter how dull you think it may be, because even worn slicer blades can cause a serious cut.
How do I remove dried or stuck-on food from around the blade?
Soak a cloth in warm soapy water, hold it against the stuck residue for 30 to 60 seconds to soften it, then wipe away with outward strokes. A soft-bristle brush works well for stubborn bits in the crevice between the blade and the housing ring. Avoid using anything metal or abrasive, which scratches the blade surface and makes future food buildup worse.
Do I need to oil the blade after cleaning?
Most home slicer blades do not require oiling, and adding oil to a food-contact surface introduces contamination risks. The better practice is to dry the blade thoroughly and store the machine in a dry spot. If the manufacturer's manual for your specific model calls for a food-grade lubricant on certain moving parts like the carriage rod or pivot points, follow those instructions exactly, applying only to the parts specified and wiping away any excess before the next use.